Update your business information
In this article, you will learn how to update all business information such as:
- Business Logo
- Business Name and Type
- Customer Service
- Advanced Settings (Set Default Tax Rate, Fee Mark-Up, Calendar Collision)
- Credits Management
Business Logo
- Go to Settings > Account Settings > Your Business
- Click on "Branding"
- Upload your business logo
You only need to upload your Business Logo once to update and display on every booking page for both old and new checkout experiences.
Old Checkout

New Checkout

Business Name and Type
- Go to Settings > Account Settings > Your Business
- Click on "Branding"
- Update your business name and type
What displays publicly:
- Business Name: Appears on every booking page and website calendar
- Business Type: Internal use only for Occasion tracking purposes

Customer Service
- Go to Settings > Account Settings > Your Business
- Click on "Customer Service"
- Update your email and phone number
When your customers need help, they will contact you using this information. This email and phone number will appear on every automated email to your customers unless overridden at the individual venue level.

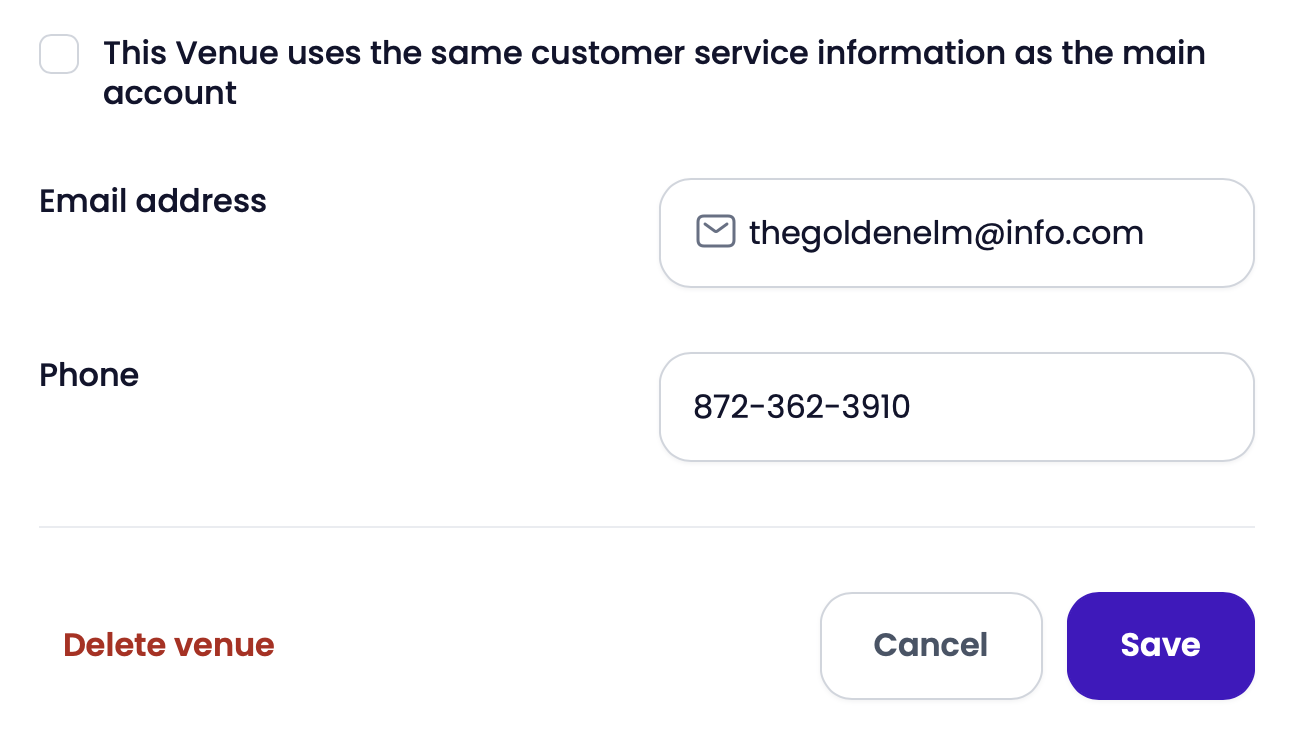
How to override this information at the Venue Setting:
- Go to Settings from the sidebar menu
- Select "Venues & Rooms" and click "Edit" on the venue you want to customize
- Update the venue's business location name, address, and website
- Deselect the checkbox "This venue uses the same customer service information as the main account"
- Enter customized email and phone number in the fields that appear
-
Save your changes

Advanced Settings (Set Default Tax Rate, Fee Mark-Up, Calendar Collision)
Go to Settings > Account Settings > Advanced Settings
Configure the following options:
- Default Tax Rate: Set your standard sales tax percentage
- Fee Mark-Up: Add fixed percentage charges to orders
- Calendar Collision: Control conflicting time slot visibility
For each item on this page, there is a help article linked. If you have any further questions, please reach out to help@getoccasion.com
Credits Management
Go to Settings > Account Settings > Your Business and click on "credit"
- Go to Settings > Account Settings > Your Business
- Click on "Credit"
- Set expiration rules for:
- Gift Cards
- Account Credits
- Referral Rewards (if applicable)
You can set automatic expiration dates upon creation or manually set expiration dates for individual credits.