Create and Customize Your Occasion Views / Public Calendars
Creating and customizing your Occasion views and public calendars is an essential part of effective event management and coordination.
💡 Pro-tip: Create multiple calendar views for different audiences (e.g., one for kids' events, another for adult classes) to help customers find relevant events more easily. Use the location filter to segment by venue if you have multiple locations.
In this article, you will learn:
How to Create a New Calendar
Creating a new calendar for your listings is fast and easy.
Note: You can add and manage up to 30 layouts (views). If you need more than this, please reach out to help@getoccasion.com for assistance.
Steps to create a new calendar:
- Click Settings > Website Calendars from the sidebar menu
-
Click the blue "+ Create New View" button in the top-right corner
- Give your calendar an easy-to-remember name like "Kids Classes"
- Select a layout for your calendar that best suits your design needs
- Customize colors and wording for your event buttons
- Configure filters and visibility options (optional)
- Click "Save Changes" to complete setup

Calendar Customization Options
Naming Your Calendar
The title you choose is only viewable on the backend for management purposes. Your customers will not see this name on their customer-facing calendar. Use descriptive names like "Kids Classes," "Adult Workshops," or "Summer Camps" to stay organized internally.
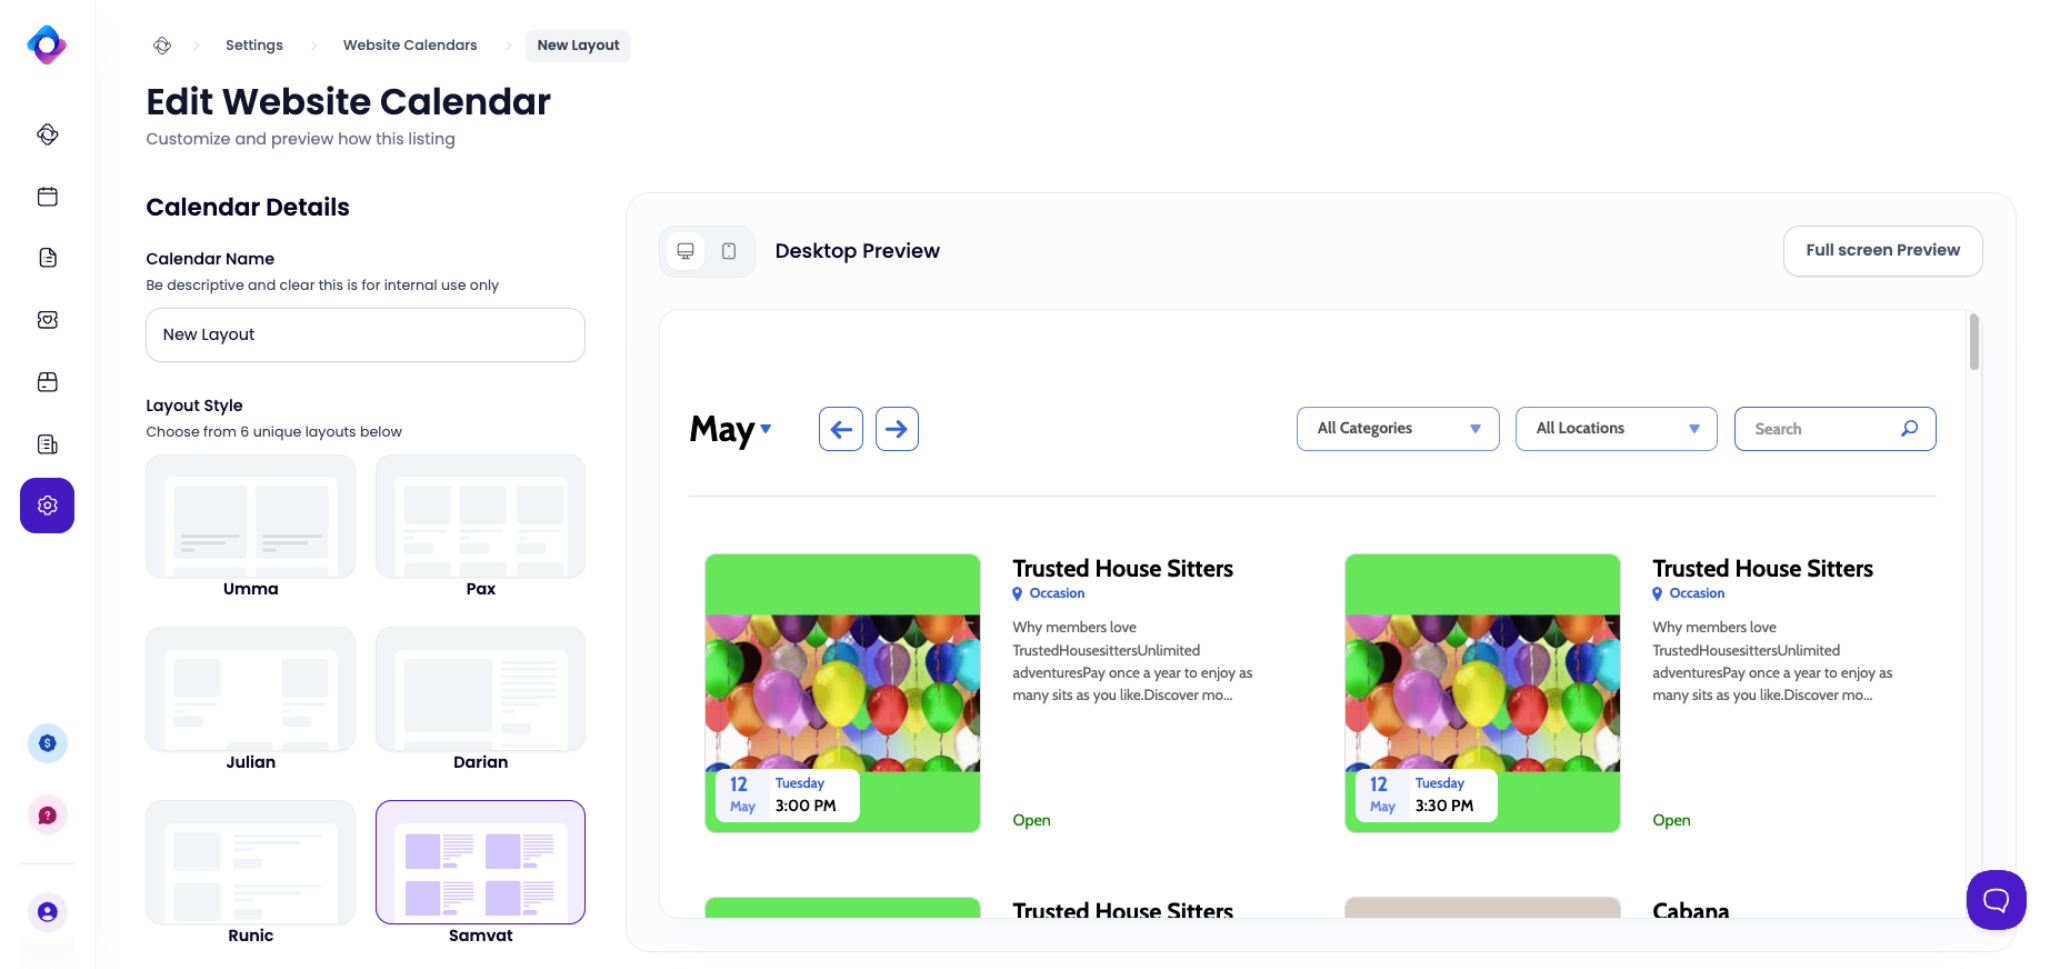
Layout Selection
Choose from six beautiful layouts:
- Umma — Two-column layout with event details
- Pax — Grid-style layout for viewing multiple events
- Julian — Sidebar layout with event list
- Darian — Single-column layout with descriptions
- Runic — Compact grid layout
- Samvat — Large grid layout (currently selected in example)

Color and Wording Customization
Customize the button appearance and terminology for different event statuses to match your brand:
- Open Events — Text and color for available classes/experiences
- Sold Out Events — Text and color for full sessions
- Announcements — Text and color for promotional messages
- Closed Events — Text and color for unavailable sessions

Options
Add Search Keyword
Add a keyword that customers can search for on the calendar. Only events containing this keyword will display on the calendar. Leave blank if you want all events to show.
Advance Options
Configure visibility and filtering:
- Show location filter — Toggle ON to display a location dropdown on your calendar (helpful if you run multiple locations). Toggle OFF to hide this filter if you only have one location.
- Do not display sold out events — Hide sold-out sessions from the calendar view
- Show private events on the calendar — Include events marked as private in the public calendar
- Do not display events closed for bookings — Hide events that are closed for new bookings
- Infinite scroll — Enable continuous scrolling instead of pagination

Deleting a Calendar
If you no longer need a calendar view, you can delete it at any time.
Steps to delete a calendar:
- Click Settings > Website Calendars from the sidebar menu
- In the "Website Calendars" hub, find the calendar you want to delete
- Click the delete icon (trash can) on the right side of the calendar row
- Confirm the deletion in the pop-up window
Note: Deleting a calendar view cannot be undone. Any embed codes or share links pointing to this calendar will no longer work.
Next Steps
Once you've created your calendar:
- Learn how to embed the calendar into your website
- Get the shareable link to your calendar
- Connect a button to the calendar as a link
- Test your calendar on both desktop and mobile devices